Dhokla is a popular Indian snack that is loved by many for its unique taste and texture. Originating from the state of Gujarat, dhokla is a steamed cake made from fermented batter of chickpea flour. It is often served with green chutney and tamarind chutney. This article will guide you through the process of making dhokla in Hindi language, step by step.
Understanding the Ingredients
Before we dive into the recipe, let’s understand the key ingredients used in making dhokla.
Chickpea Flour
Chickpea flour, also known as gram flour or besan, is the primary ingredient in dhokla. It gives the dhokla its characteristic texture and flavor.
Yogurt
Yogurt is used to ferment the chickpea flour, which gives dhokla its unique taste. The fermentation process also helps in digesting the chickpea flour.
Green Chilies
Green chilies are used to add a spicy kick to the dhokla. They can be adjusted according to your preference.
Mustard Seeds
Mustard seeds are used to temper the dhokla batter. They add a nutty flavor and crunch to the dish.
Asafoetida
Asafoetida, also known as hing, is a spice that is used to enhance the flavor of the dhokla. It has a strong aroma and is used in small quantities.
Salt
Salt is used to season the dhokla batter. It helps to balance the flavors and enhances the taste.
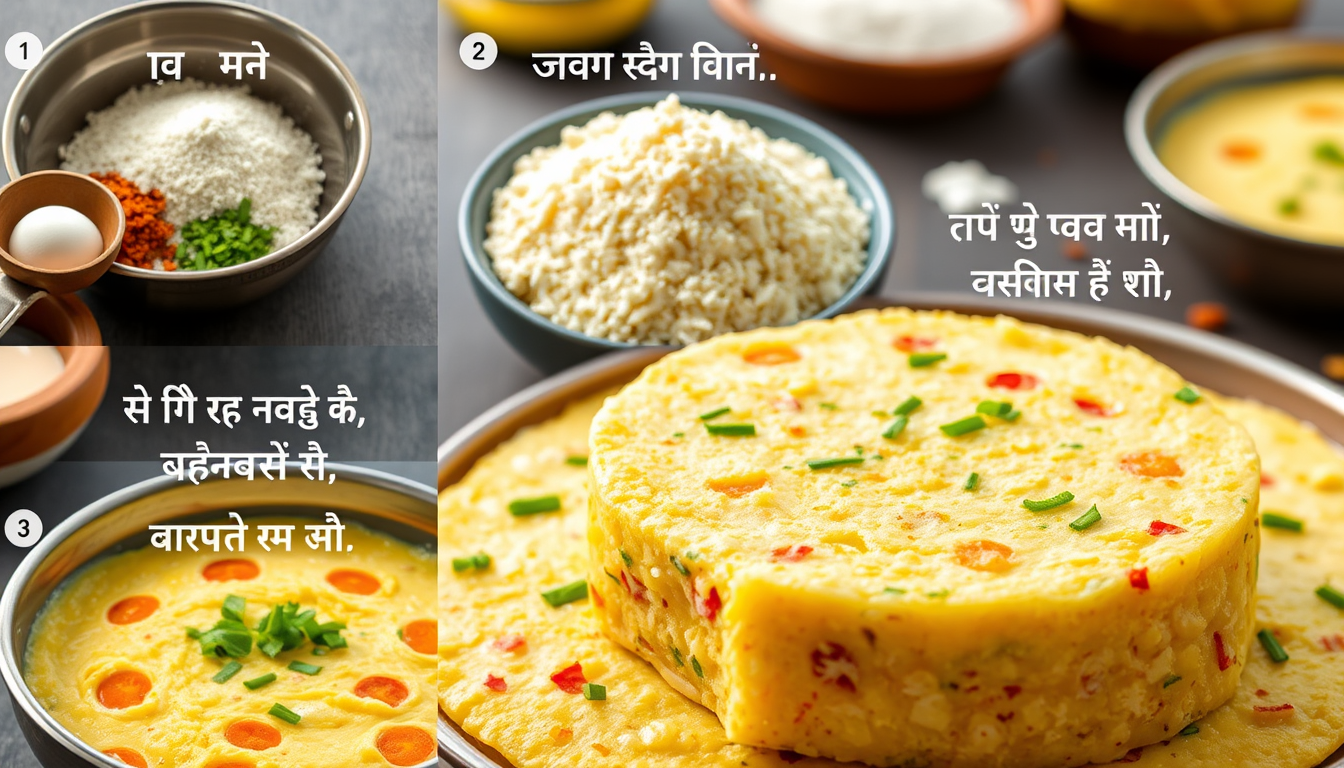
Preparing the Batter
The first step in making dhokla is to prepare the batter.
Step 1: Mixing the Ingredients
In a large bowl, combine 2 cups of chickpea flour, 1 cup of yogurt, 1 teaspoon of salt, and 1 teaspoon of sugar. Mix well until there are no lumps.
Step 2: Adding Water
Add 1 cup of water to the mixture and mix well. The batter should have a consistency similar to that of a thick pancake batter.
Step 3: Fermenting the Batter
Cover the bowl with a clean cloth and let it ferment in a warm place for 6-8 hours. The batter will rise and develop a sour taste.
Cooking the Dhokla
Once the batter is fermented, it’s time to cook the dhokla.
Step 1: Greasing the Steamer
Grease a steamer with oil or ghee to prevent the dhokla from sticking.
Step 2: Pouring the Batter
Pour the fermented batter into the greased steamer and smoothen the surface with a spatula.
Step 3: Steaming
Steam the dhokla for 15-20 minutes or until a toothpick inserted into the center comes out clean.
Tempering the Dhokla
Tempering is an important step in making dhokla. It adds flavor and enhances the taste.
Step 1: Heating the Oil
Heat 2 tablespoons of oil in a small pan. Add 1 teaspoon of mustard seeds and let them splutter.
Step 2: Adding the Spices
Add 1 teaspoon of asafoetida, 2-3 green chilies (slit), and 1 teaspoon of turmeric powder. Sauté for a few seconds.
Step 3: Pouring the Tempering
Pour the tempering over the steamed dhokla and mix gently.
Serving the Dhokla
Dhokla is best served with green chutney and tamarind chutney.
Step 1: Cutting the Dhokla
Cut the dhokla into squares or diamonds using a knife.
Step 2: Serving
Serve the dhokla hot with green chutney and tamarind chutney on the side.
Variations of Dhokla
Dhokla can be made in various ways to suit different tastes.
Green Dhokla
Green dhokla is made by adding green chilies and coriander leaves to the batter. It has a spicy and tangy taste.
Paneer Dhokla
Paneer dhokla is made by adding paneer (cottage cheese) to the batter. It has a creamy and soft texture.
Vegetable Dhokla
Vegetable dhokla is made by adding mixed vegetables to the batter. It has a colorful and nutritious appearance.
Tips for Making Dhokla
Here are some tips to help you make perfect dhokla every time.
Use Fresh Yogurt
Using fresh yogurt ensures that the fermentation process is smooth and the dhokla has a good taste.
Let the Batter Ferment Properly
Proper fermentation is crucial for the taste and texture of dhokla. Ensure that the batter is left to ferment for the recommended time.
Grease the Steamer Well
Greasing the steamer well prevents the dhokla from sticking and makes it easier to cut.
Serve Immediately
Dhokla is best served hot and fresh. If you need to store it, keep it in the refrigerator and reheat before serving.
Conclusion
Making dhokla at home is a rewarding experience. With the right ingredients and techniques, you can enjoy this delicious and nutritious snack anytime. Whether you prefer the classic dhokla or one of the many variations, this recipe will help you make the perfect dhokla every time. So, go ahead and try making dhokla at home and enjoy the unique taste of Gujarat.